Pages


Wednesday, November 16, 2011

Alien 3 BD409 EEV Completed

The final touches to the weathering have been completed. A flay coat of Gunze clear flat was applied to the model to seal the weathering so far. Oil paint streaks were applied to the underside of the vehicle using both 501 Abteilung and windsor and newton oils.

 Some metallic shine was added to the docking ring area using a 6B lead pencil.


Once I was satisfied with this effect I added some grimy staining on selected areas to match the reference pictures using Mig Productions Industrial City Dirt pigment. This effect was also concentrated on the areas around the mounting prong holes to suggest the dirty mechanism used to attach the EEV to the Sulaco.


This was again sealed in with clear flat.

Some additional detail painting was done using Citadel acrylic paints.

The entire EEV was now ready to be wired up and mounted to the flight recorder base.

I passed my wiring through the Aluminium tube and then passed the tube through the mounting holes in the EEV and the flight recorder.

The wiring was soldered together and tested, all working well (phew)! which was a relief.

All that remains to do is to capture a quick video of the lighting effect for you to see.

So stay tuned for a video post of this soon.

Until then,

Cheers,

Tuesday, November 8, 2011

Weathering Part 1

The decals were sealed in with another coat of Tamiya clear acrylic to protect them and then the weathering could begin.

The whole vehicle was given a pin wash around the raised and engraved details using Mig Productions dark wash.

Once this was dry it was tidied up with a cotton bud dampened in odorless turps.

It was now time to add the remaining few details on the panels with the numbers and hand paint black and yellow areas with Citadel Acrylic.


More soon,

Cheers,

Wednesday, November 2, 2011

Markings Part 2

I feel that this model would just not look right without some kind of tiny stenciling on the hull. To this end I discovered a sheet of red stencil decals that are inteded for Gundam models.

These were place on hatches etc following my reference pictures as well as some artistic licence of what I thought looked good and appropriate.

Many of the tiny stencills were added around the end access hatch doors.

Stencilling was also found on the top cryotube entry hatches. Some of the raised hatch parts were touched in with some Citadel blood red acrylic paint and a fine brush.

These decals are from HiQ Parts, the decals themselves are tiny and were printed by Cartograf and they performed flawlessly - a very impressive quality product, you can actually read the tiny lettering with a magnifying glass.

Finally I needed to add my home made custom decal, I carefully cut the decal to the exact size of the panel onto which it goes using the paper templates used to cut the actual parts as a guide. The decal went on very well and settled quickly. Because the decal is the same size as the raised panel its film edges are invisible.

More soon,

Cheers,

Wednesday, October 26, 2011

Markings Part 1

Markings were added to the upper hull last night in the form of numerals.

The numbers are dry transfer lettering made by 'Lettraset', and they were cut from the sheet in a strip containing the numerals 1 to 9 and burnished onto the model with a special burnishing tool. It is essential to remember when using lettraset that once you have the number on the model to use the blue backing paper of the sheet to burnish over the number to really set it in place.

The numbers were then given a quick coat of Tamiya gloss clear to protect them.

The other job done last night was the painting of the detail on the mounting prongs. This job was done using Citadel acrylic paint 'codex grey' as it was a close match to the Tamiya neutral grey used previously. Citadel paint was used as this detail had to be brush painted and these are simply the BEST paints to brush apply, leaving no trace of brush strokes or imperfections.

More soon,

Cheers,


Tuesday, October 25, 2011

Painting Part 3, Neutral Grey

The panels and parts that were to be painted neutral grey were masked up and sprayed in Tamiya neutral grey.

The model was photographed under flourescent lights this time to try to demonstrate how the Floquil grime base colour changes with the lighting. In this shot notice how it looks less warm and more light grey than in previous shots.

More soon,

Cheers,


Monday, October 24, 2011

Base Part 6 Weathering

Before I get to the base, the EEV base coat has been applied in several light coats to get a nice even coverage, I have now set this aside for a few days to let the Lacquer paint cure fully before I over spray with acrylics.


The flight recorder base has received multiple coats of Tamiya clear acrylic to hide the substantial decal film. Once all of this was dry, a Mig productions dark wash was applied to all of the corners and raised detail, particularly the ridges of the silver areas. Any excess was removed with a cotton but dampened with Mig odourless Turps.

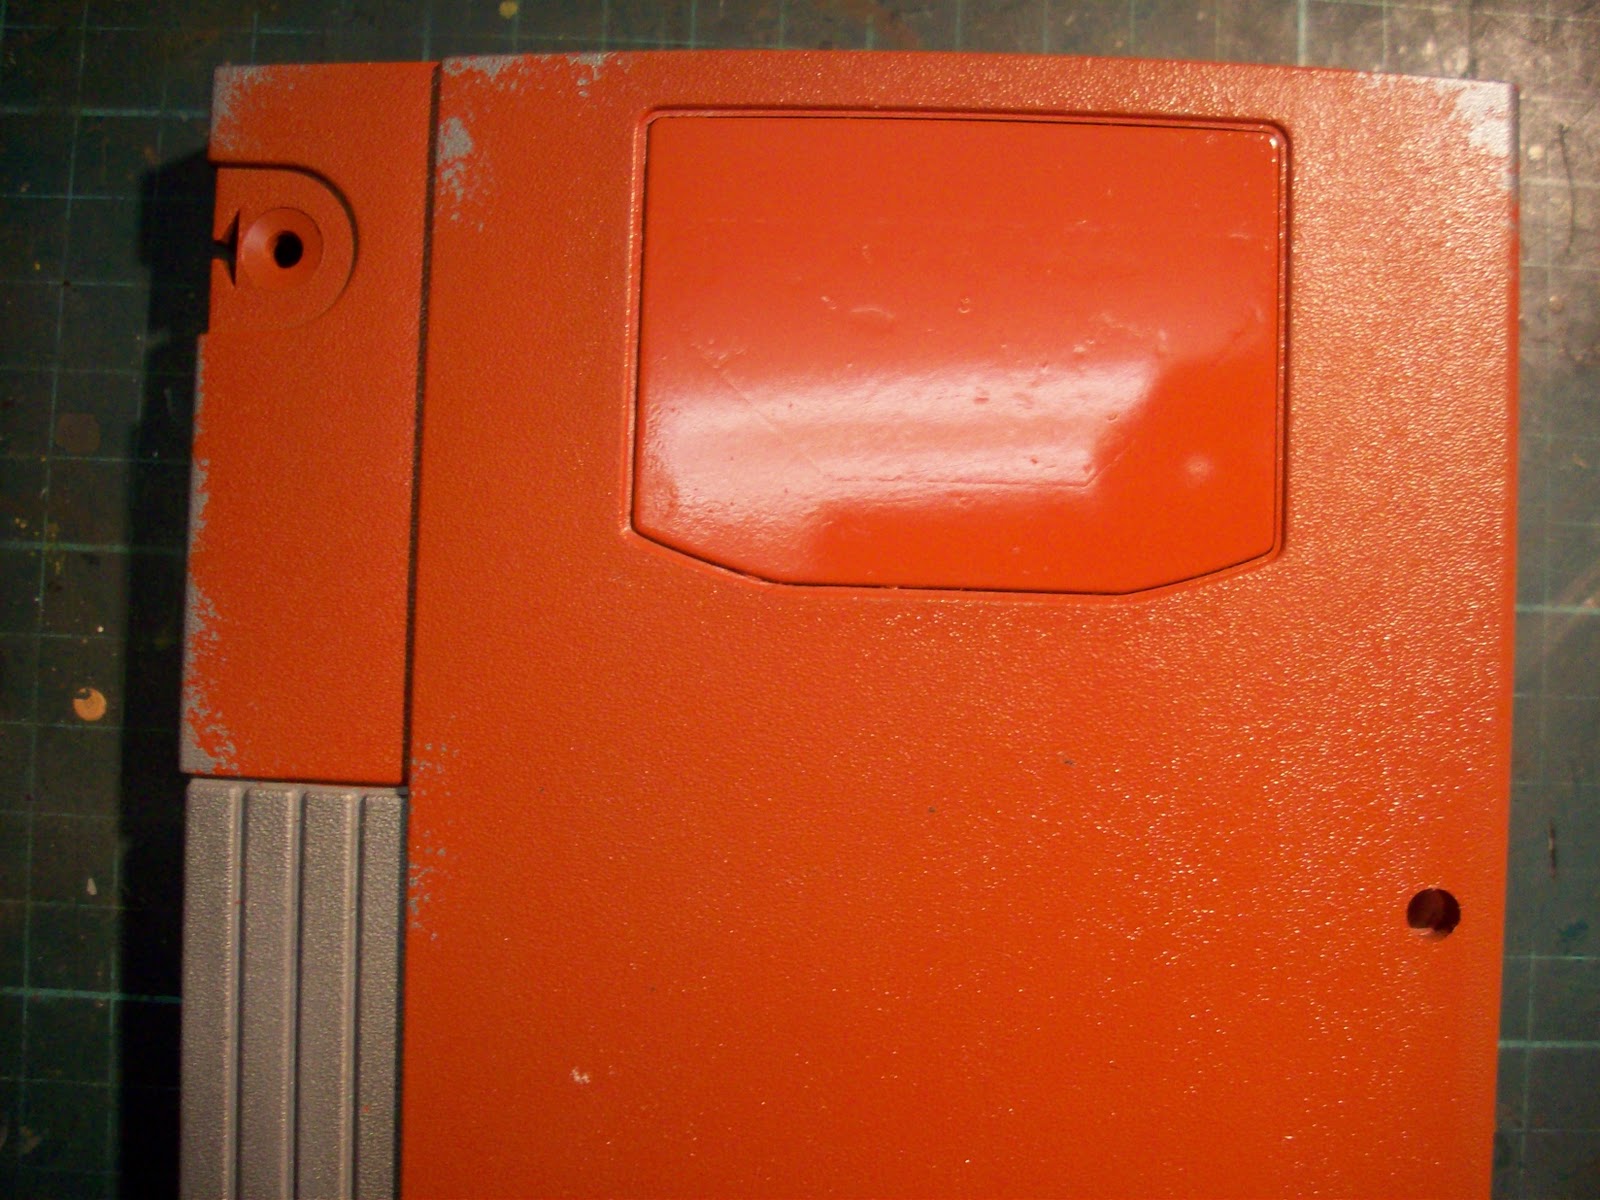
Once this was completely dry the large expanses of orange were tackled. My aim here is to try to break up the monotonous colour areas and add some subtle variations in hue and intensity.

The weapon of choice for this was 502 Abteilung oil paints, I used rust, tritone fading and German grey fading. the orange surface was first dampened with some Mig odorless turps, then small dabs of each oil colour added with a small brush randomly to the surface.

The oil paint spots were then blended in with a clean soft dry brush, a streaking motion used for the vertical sides and a swirling motion for the flat top and bottom.

An excellent video tutorial of this technique by Fitchtenfoo is available to view here.

This is now allowed to dry and more can be added until a pleasing result is attained.

More soon,

Cheers,

Friday, October 21, 2011

Painting Part 2 Base Coat

The base coat was sprayed on last night.

The colour I chose is a model railway colour again from Floquil called Grime, which is an interesting colour as it can display many hues depending on the lighting. It is best described as a very light off white / grey.


This incidentally is the colour used by ILM when painting the studio filming miniatures such as the Millennium Falcon and the Imperial Star Destroyer from the Star Wars movies.

More soon,

Cheers,

Thursday, October 20, 2011

Painting Part 1 - Primer

This is one of the most important steps of the whole painting exercise. The primer coat will show up any construction faults and this is the last opportunity to put them right.

The bottom of the hull was given a coat of Mr Surfacer 1000 which immediately showed up several seams that needed to be fixed. The seams were treated to some Mr dissolved putty and when dry sanded smooth.

The whole craft was then primed in Floquil primer, this is a model railway laquer based paint that those in North America should know well, its the best primer I have found by far. At this point I must admit that I almost forgot to mask my fibre optic lights, they were given a liberal coat of Humbrol maskol to protect them from the paint.

Again the surfaces were examined for flaws and I am happy to report none were found so the craft will be ready to receive the base coat of paint next.

The model takes on a whole new feel now it is in primer and I am really looking forward to seeing the base colour on it.

More soon,

Cheers,

Monday, October 17, 2011

Construction Complete!

I have managed to complete the construction of the EEV over the course of the week end. There are a still a couple of small parts to add after the painting and decaling stage is complete.

The top of the hull received the most work with styrene laninated onto it to reproduce the relief details prior to the cryo-tube arches and other pre-made parts were added, however almost no part of the vehicle escaped some sort of additional detail.

All of the additional detailing was done with styrene strip and shapes.


It is worth noting at his point that there are significant differences between the paper model plans used as a basis for this build and the actual studio model used for filming. Differences lie in both the general shape as well as the details.


I tried to incorporate as many of the details from the actual studio model that I could and although the overall shape is different I feel that it represents the EEV quite well and I am very pleased with what I have achieved so far.

All that remains before painting can begin is a clean up of the seams with some filler putty and some sanding.

More to come,

Cheers,

Friday, October 14, 2011

Detailing Begins

The last parts for the Mounting prongs were added last night. Then it was on to detailing the upper hull.

The detailing strips were cut from evergreen styrene with a NWSL chopper to ensure they were all exactly the same and then glued onto the hull.

I also decided to add strengthening webs to the end hatch using small triangles cut from styrene strip.

I am fairly pleased how this came out and I think it adds that little extra level of detail that offsets the rest of the end part.

The cryotube arches and associated details are now ready to be added and this project is getting close to going to the paint shop.

More soon,

Cheers,

Thursday, October 13, 2011

Mounting Prongs Part 3

The remaining mounting prongs were added to the main hull.

Plenty of Tamiya extra thin glue was used to get a strong bond.

The raised part of the prong still needs to be continued across the rest of the hull shape, this will be done by laminating styrene strips to a thickness to match.

After that is completed the detailing of the hull face can begin.

More soon,

Cheers,

Wednesday, October 12, 2011

Base Part 5 Decals

My faith in custom made decals has been restored, and really I should have known better than to attempt to use setting solution on them.

The flight recorder pnael with the decal now needs some thick coats of clear to hide the substantial decal film.


The mounting prongs had the filled seams sanded and the detail added.

More soon.

Cheers,

Tuesday, October 11, 2011

Mounting Prongs Part 2

The two remaining mounting prongs were constructed fromm 0.75mm styrene sheet.

The seams were all treated with Mr dissolved putty and will be sanded up when this is dry.

Onto the decals..... well not quite!

Decaling the flight recorder base was a disaster. The custom made decals wrinkled up instantly and then the ink bleed out from the wrinkles. Unfortunately I did not discover this problem until my second attempt at the decal dried. I had to rip the decal off and this of course striped off some orange paint.

The flight recorder panel was sanded down and re-coated with orange, at least this gives it some variation in tone from the rest, which I like.
I now have used up two of my custom decals and failed. I feel this may be because I am using a setting solution on them (Mr mark softer). My next attempt at the decals will be with no setting solution, so I hope that works.

More soon,

Cheers,

Monday, October 10, 2011

Base Part 4 Decals and Transfers.

I decided to try out some dry transfer lettering on the flight recorder base before using them on the EEV.

These were burnished onto the rear of the flight recorder base with a burnishing tool and this worked surprisingly well - even on the slightly undulating surface. They were then given a coat of clear gloss acrylic to seal them in, much quicker and better than decals.


Speaking of decals, a good friend of mine helped me out and made some custom decals using inkjet decal paper and photoshop on his computer and printer.

The larger decal is for the flight recorder base and the small decal for the EEV itself, the set repeated 4 times - just in case!

More soon,

Cheers,
 
eScale Models Link Repository