Pages


Tuesday, August 24, 2010

Trench Completed & Other Details

Time for another update, the trench details have been completed. This part was a lot of fun, I was able to add heaps of parts from 1:1200 scale ship kits including an aray of cool looking gun emplacements of varying styles.


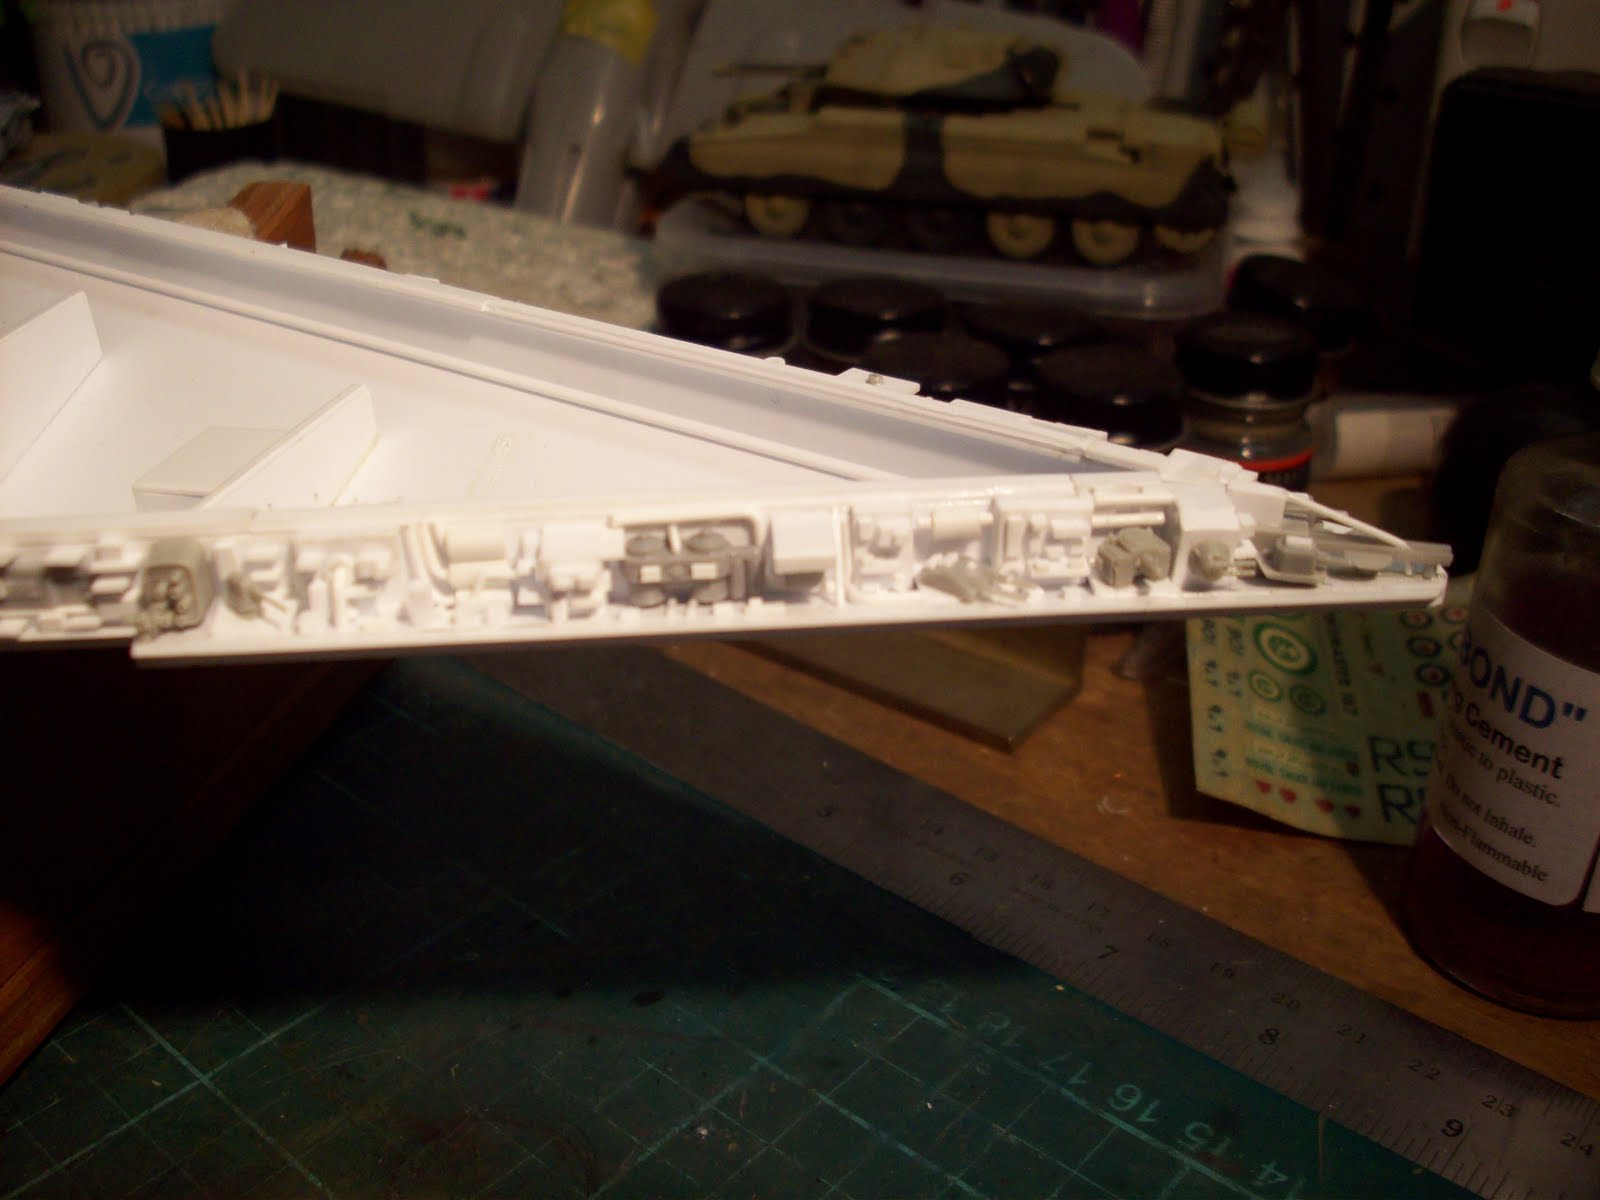
I followed the reference photos for the 'Devestator' from 'A New Hope' and added some cool guns to the small cut out in the trench. The 'Devestator' has some really cool gun turrets for the main guns - but more on that in a future post.


I also used a pile of parts from car kits in the trench including, brake cylinders, oil filters and carburettors....


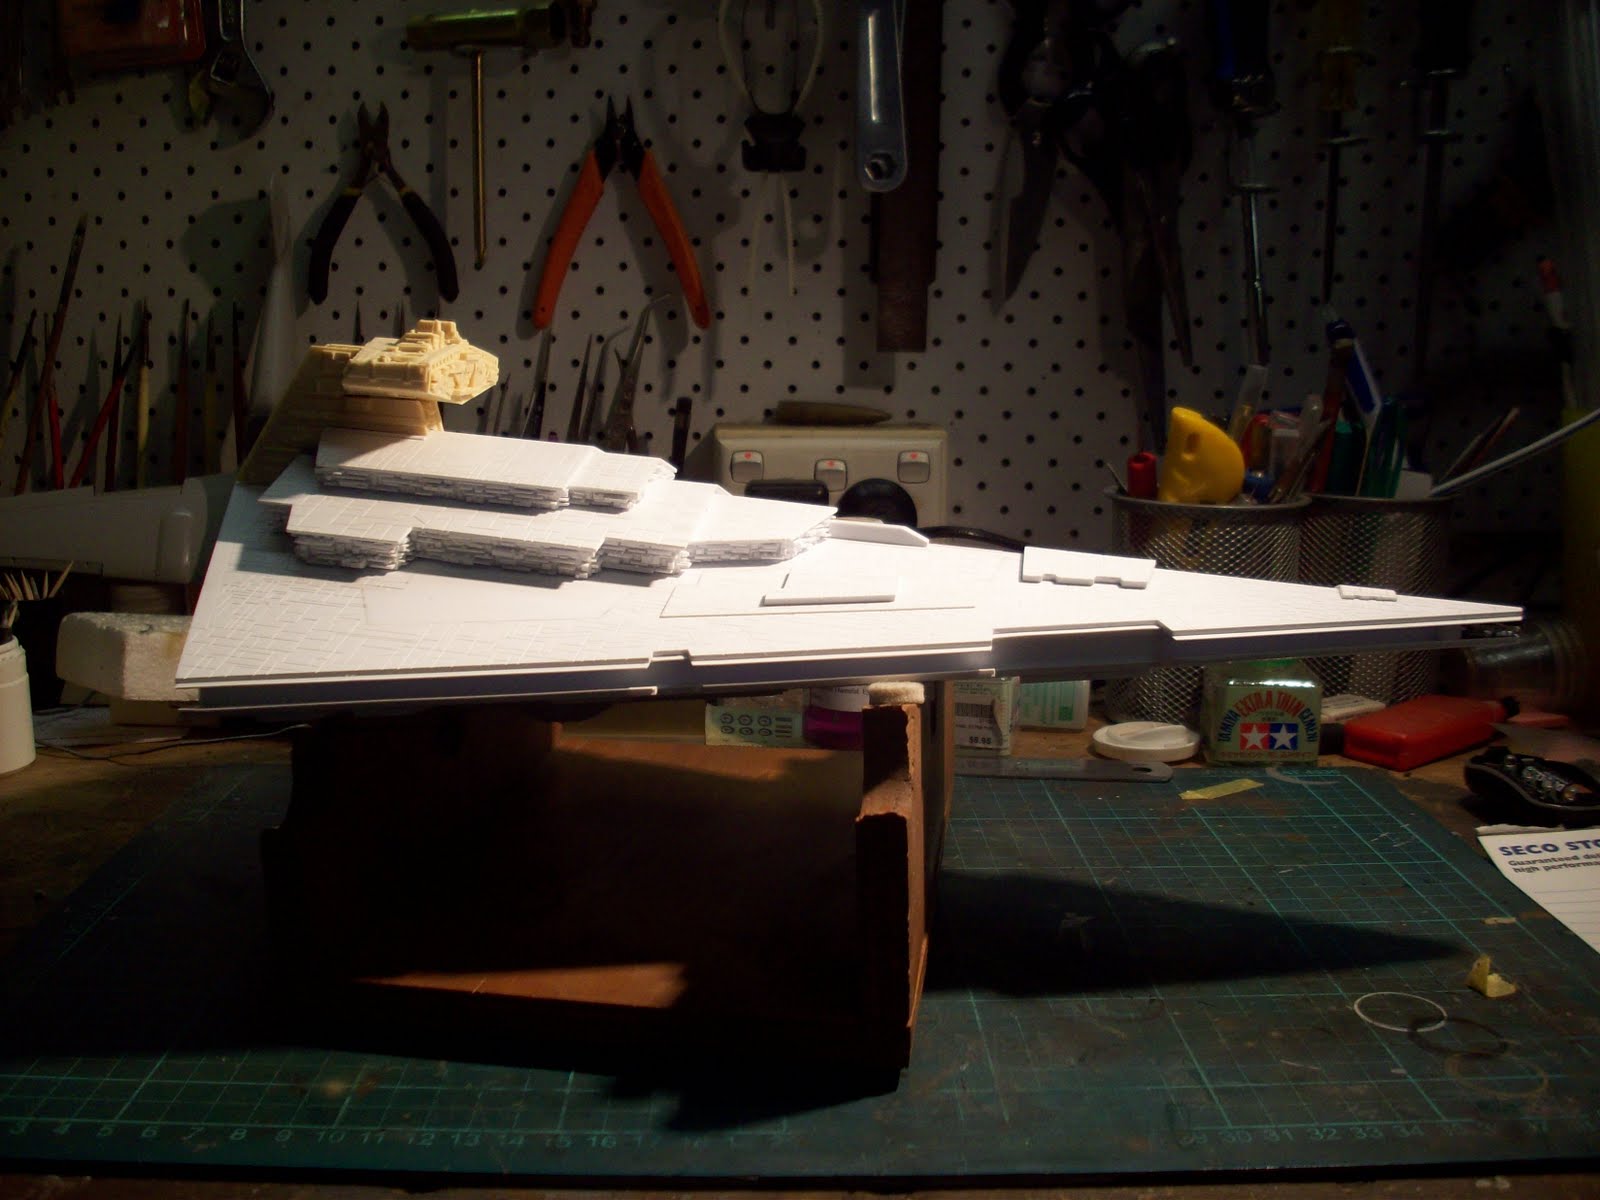
I also finished the main hanger bay surround and details as well as the tractor beam projector emplacements just fore of these.


I was also able to permanently attach the bridge using epoxy glue and superglure to hold it until the epoxy dried.


Other detailing added was some to the area in front of the superstructure, AA gun mount from a 1:72 panther and an oleo leg from a 1:144 F117 giving the details.


The main gun emplacement base has also been added and the holes drilled so that the turrets can be centered.


The vane details on the hull rear have been added from various stip styrene lengths and the lower sloping peice for the engine area also added. At this stage the entire hull is still in 2 halves top and bottom and they will have to permanently joined soon so that work on the engine area can begin.

Thanks for reading,

Cheers,

Tuesday, August 17, 2010

Trench Details

Unfortunately I have been quite busy of late and as a result modelling time has suffered, however I have managed to ma a bit of progress on the trench details.


Random parts from 1:1200 scale ship kits have been added to the trench I just add stuff that I think will look cool.


I also add some styrene rod bent up to represnt pipework and some randon styrene shapes in the same manner as the superstructure.


I am just a little over half way now on the trenches and I hope to have them finished by the weekend, so stay tuned.


Cheers,

Monday, August 9, 2010

Bridge Neck and Details


The detailing on the superstructure has been completed, I started using some greeblies from kit parts on the rear of the superstructure to give this area more of an engineering, mechanicial feel as it will be close to the engines.


I added the Arvey Models bridge neck using epoxy glue and them shimmed and filled the gaps before adding somegreeblies on the joint to disguise it.


The Bridge section has only been added using blu tack for the photos as I am sure I will knock it off during the rest of the construction sequence. It will be epoxied into place nearer to the end of construction.


The next section that I have started work on is the trench detail. I decided to start at the nose as I thought that a logical place, as well as an area of the ship that would be packed with guns and weaponry.


I started using parts that I have been accumulating from 1:1200 scale ship kits, particularly the revell german WWII battleships and the Hobby Boss modern american cruisers.


That is all for now but stay tuned - hopefully I will be able to update again soon.

Cheers,
 
eScale Models Link Repository