Pages


Thursday, April 29, 2010

There is a use for Gundam Stickers!

Yes gundam stickers do have a valid use! I used them to make an exaclty fitting painting mask for the visor on my model. I simply laid in onto some Tamiya masking tape and cut carefully around it.


It fitted perfectly onto the visor on the head nicely masking it for the following paint job.

I masked the camera ports with Tamiya tape by placing it onto the part then using a toothpick to burnish in the shape. A sharp hobby blade then bing used to cut out the shape.

I decided to start off a little differently on this model. I dispensed with the grey laquer primer and primend the entire kit with Tamiya Titanium gold instead.

I read somewhere that Gundams were made of Gundamium metal.... something differently ficticious so Tamiya Titanium gold might well represent that futuristic different metal.

This is quite a cool metallic colour and will really look different showing through the paint in the chipped areas. (Hopefully)!

To be continued....

Wednesday, April 28, 2010

Alclad and Clear Colours

Well I have finally found some time to post an update. The painting process has started with the metal parts and clear colour effects.
I chose Alclad Polished Aluminium to represent the highly reflective metallic parts on this model. The first step with polished alclad colours is to apply a high gloss black undercoat. Humbrol gloss black enamel is my choice for this as I can always get a very glossy smooth coverage from it.

24 hours drying time is given to the enamel paint to fully cure before the Alclad is added. The Alclad is misted on in very light coats and the result is like watching magic happen. A perfect reflective metal finish.
Again 24 hours is set aside for the paint to dry (Alclad actually drys remarkably quickly as it is a laquer paint).

The clear colours can now be sprayed on. Tamiya clear green, clear red and clear orange were used here. Green for the visor and camera ports on the head, red for the inside of the thrusters and orange for the Apsalus ii weapon?? (is that what it is?).

Again the clear paints were misted on in very thin coats to build up a nice glossy finish. I always thin my Tamiya acrylics with acrylic laquer thinners from my local hardware. I find that this reduces the viscosity of the paint and you can get much better results at lower air pressures.

Till next time,

Cheers,


Friday, April 23, 2010

Glue and Seams Continued...

More assembly and seam work in the past two days.

Here you can see the results of my liquid glue and hobby knife scraping technique that I described in my last posting, the raw seams are on the right. After a coat of primer the seam line completely dissapear.

Any panel lines that get affected by a seam are scribed back in with an Olfa 'P' cutter.

Assembly then continues with the torso parts. I ended up doing a small modification to the front armored skirts as the kit supplies these two parts joined. To increase the poseability of the kit I separated the front skirts with a razor saw and added some tubing and wire to the torso part to hold them straight and even. They now move independantly of each other.

The upper torso and head were also assembled at this time, taking time to align the parts as best I could to minimise the seam work to follow.


Finally here is a picture of the finished legs with all of the seams dealt with without using any filler.


Until next time,

Cheers,

Wednesday, April 21, 2010

Joints and seams

I have been working away at the basic assembly of this kit for the last 2 evenings. I'm gluing the parts together with Tamiya liquid cement and cleaning up all of the seams as I go.

A couple of areas have needed filler particularly on the underside of the feet. I use Tamiya grey filler and sans smooth when its dry.

The beam rifle is quite an impressive weapon and should come up nicely with paint.


Here the main leg assemblies are together, these still need the seams dealt with, then it will be on with the torso and head.
I have also started the upper and lower arm parts. I have found that if you add just the right amount of liquid glue the melted plastic will ooze up out of the joint to fill in most gaps. A simple scraping with a modeling knife when its dry being enough to eliminate the seam.


To be continued.....

Monday, April 19, 2010

HG GM Sniper

Well this is the next kit I have decided to put my efforts into. Essentially it is exactly the same gundam kit as the RGM79-G that I just finished, except it has a cool looking sniper rifle and a Zeon Spaceship as well.


I'm planning a slightly modified paint scheme than whats shown on the box art, to my way of thinking a sniper really should be camoflaged well, green on green camoflage will be used.

I joined the first leg parts and whilst waiting for the glue to set I assembled the Apsalus III mini kit into 2 halves for painting.


Stay tuned for more on this build.

Cheers,

Thursday, April 15, 2010

RGM79G FINISHED

The final steps to finishing this kit have been made, I added some subtle streaking to simulate leaks and water marks.

Artists oil paints are a blessing for this job, a small dot of oil paint is added to the top of where you want a run to start. A clean brush that has been dampened with artists white spirit is then used to drag the dot of paint down to create a nice streak. The shape and length of the streak can then be adjusted by cleaning the brush off and repeating the process.

A final coat of flat was added to the glossy decalled areas and I'm going to call this one done.

Enjoy the photo gallery below.


Cheers,

Wednesday, April 14, 2010

Decals & Weathering.

Hello all back again with a new update.

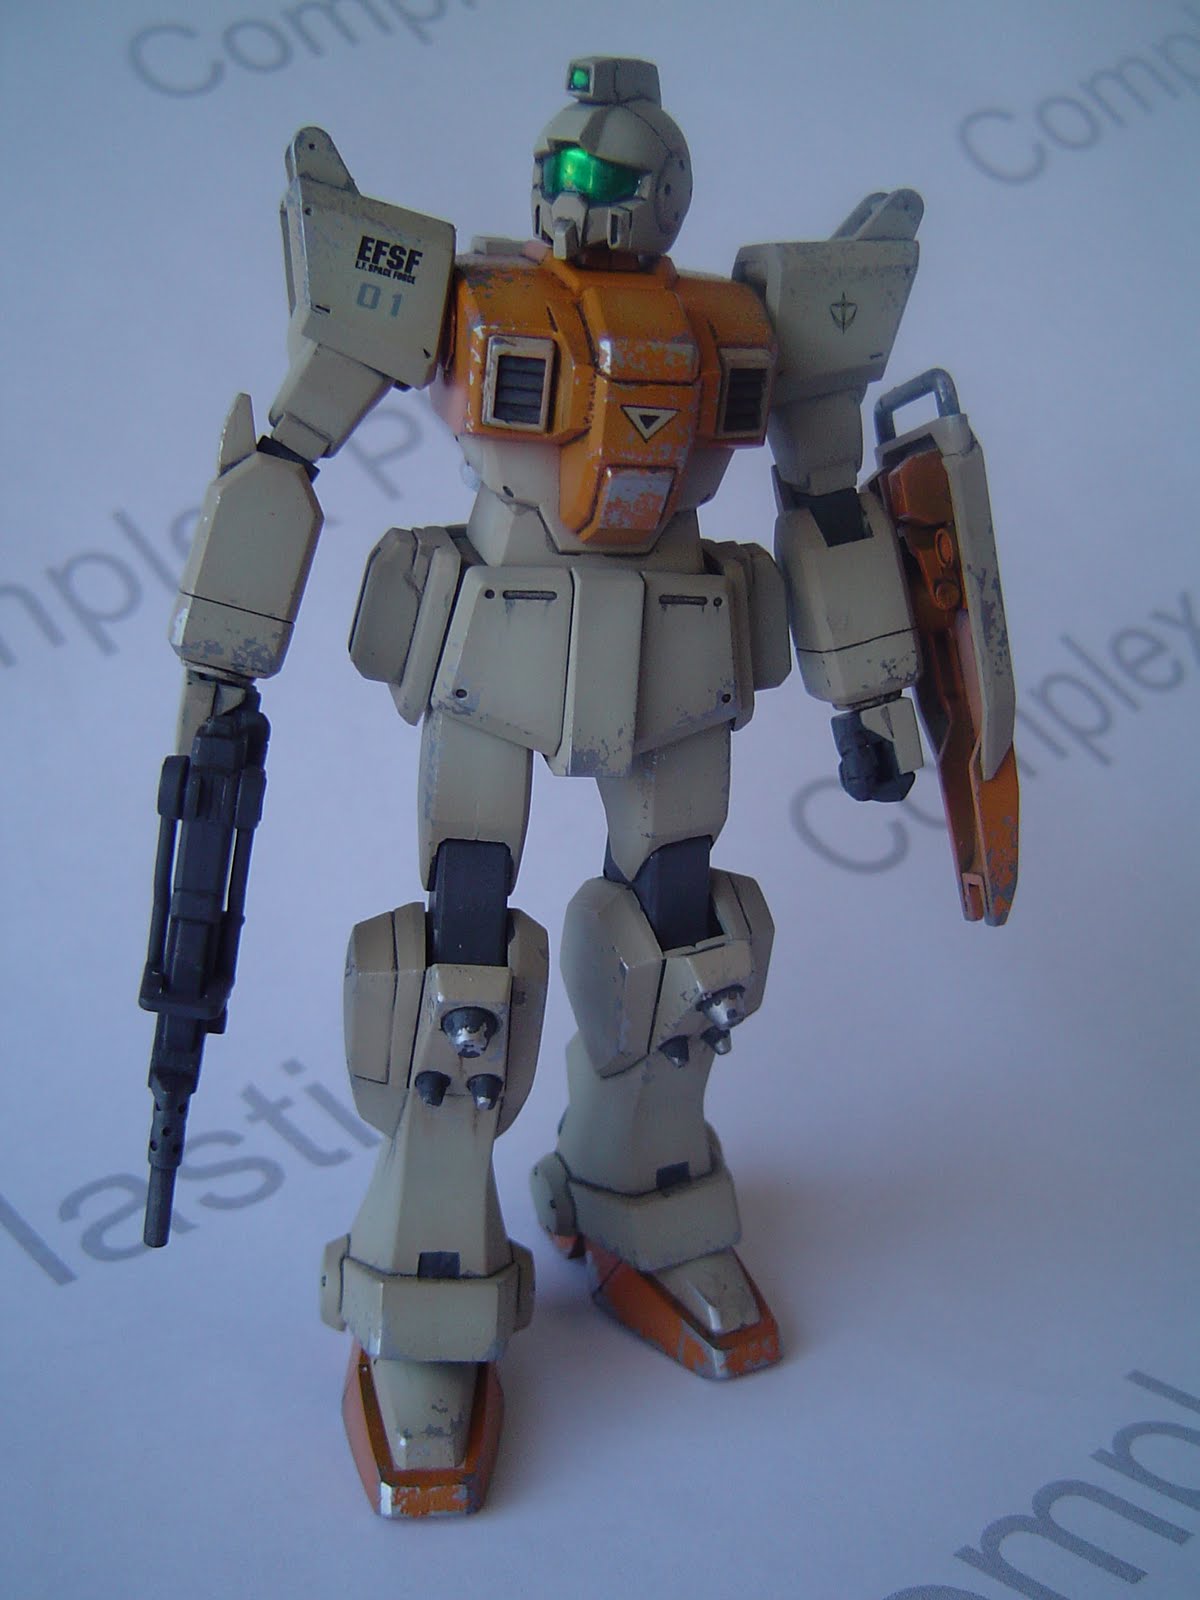
To continue on with this build, I added a pin wash to the panel lines and raised detail and edges using Mig Productions dark wash.

The was is applied with a fine pointed brush and allowed to flow around the details and along engraved panel lines.

This enhances the depth of the details and adds to the weathered appearance of the mech.
The gun was painted grey and the barrel was painted using acrylic liquid graphite that I found in an art shop. I used grey graphite for the end of the barrel and blue graphite for the cooling jacket. The great thing about this stuff is that once dry it can be buffed with a cotton but to give a very convincing metallic sheen.

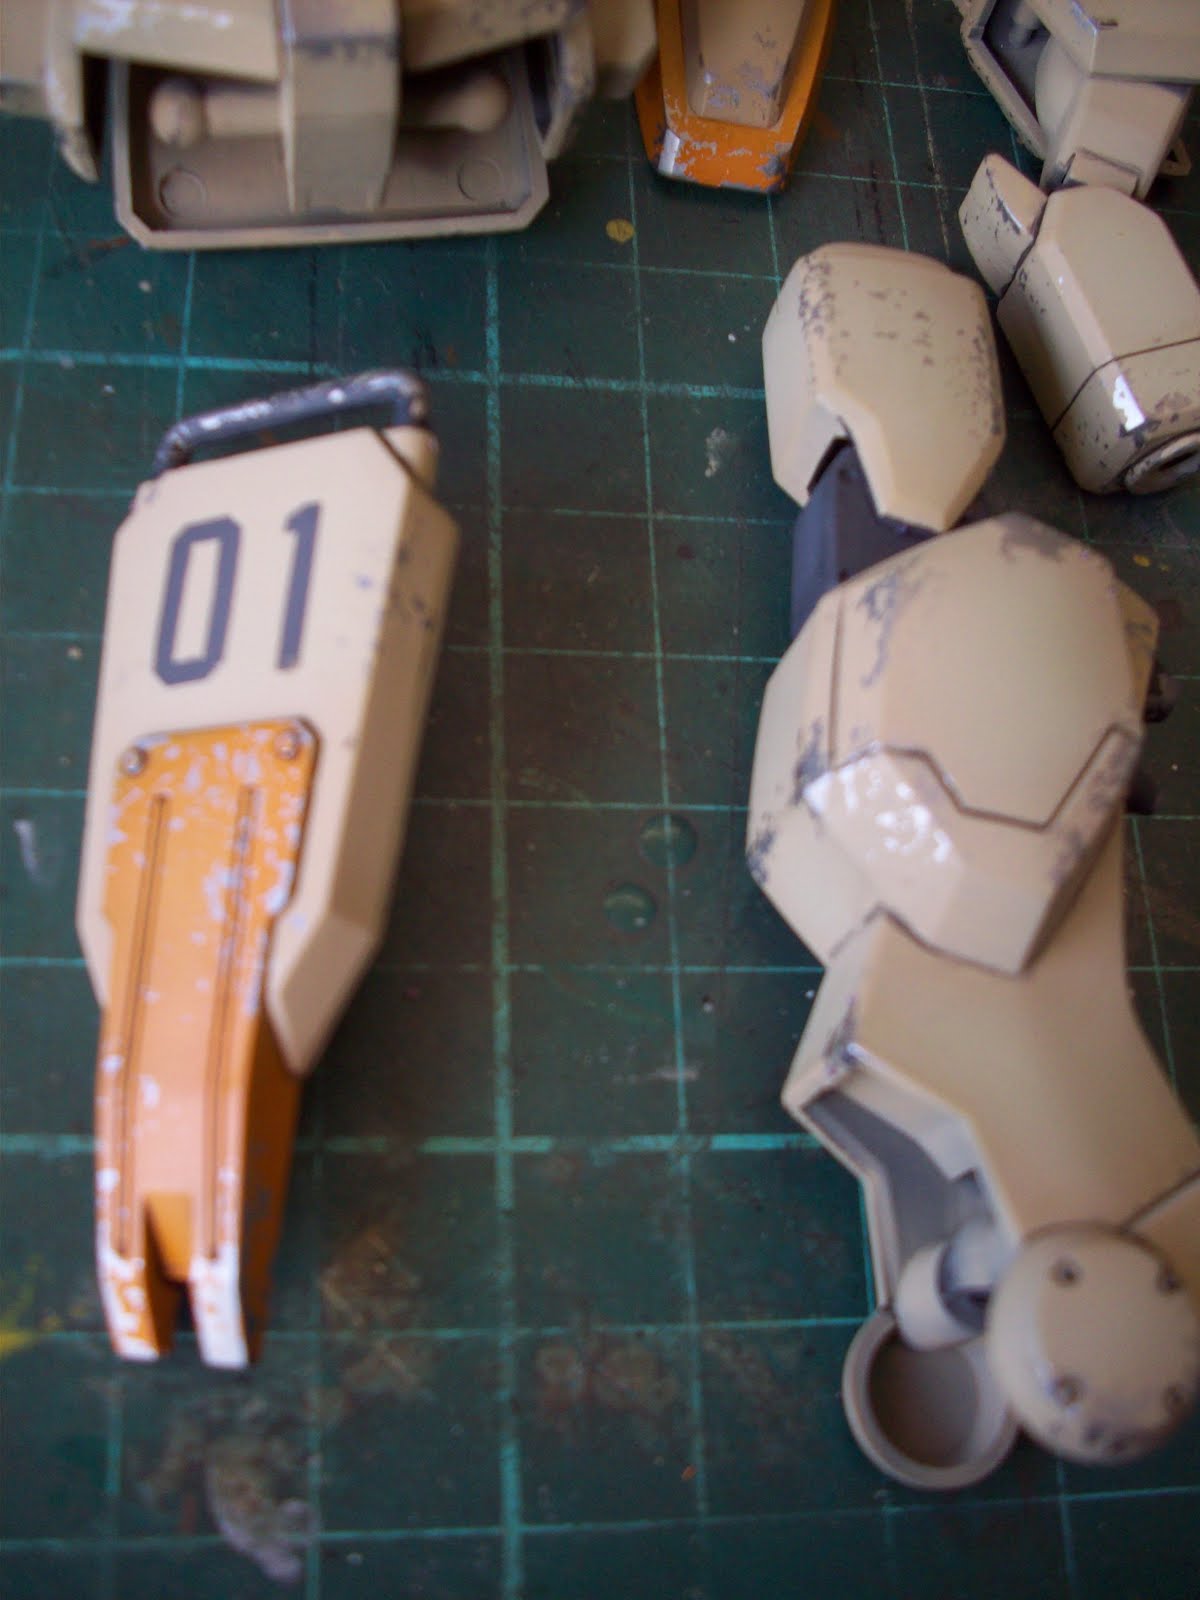
The shield was treated to the wash as well and I am particularly happy with the overall used appearance of this item.

I plan to add a scorch mark to the shield in the final stage of weathering to come, to add some further character.

A coat of acrylic gloss from Gunze Sangyo was added to prepare the kit for decals. As the kit only came with stickers, I had to search for after market decals and was lucky enough to find some intended for other 1:144 scale gundams.


There were a few markings however that I had to paint on. The shield numbers I have mentioned previously but the chest triangle marking was another and there are 2 other triangle markings one on each leg as well. These were created bu cutting out masking tape templates and spraying the colours. The fine black borders were drawn on using a 0.05mm permanent pen that I picked up in an art shop.

The Bandai after market decals went down very well with the help of Gunze Sangyo Mr Mark Setter and Mr Mark Softer. The decals were left to dry for 24 hours and a gloss coat was applied to seal them in followed by a flat coat.


Well that it where I'll leave it for now, so until next time, Happy Modeling.

Cheers,

Tuesday, April 13, 2010

Painting Continued

The next step involves choosing a nice base metal colour for the Gundam. I built a Star Wars Trade Federation Hover Tank last year and did a chipped and battle damaged finish in the same method that I would do say a WWII tank. Comments were made at my club that in the future surely the metals used would not rust... which is a fair comment I thought.


Bearing this in mind I looked through my acrylic metalic colours and decided upon Tamiya Titanium Silver as the base metal colour. I masked up the parts which were to remain grey then I airbrushed titanium silver on the entire outer surfaces of the robot.


The thrusters on the back then received a brush coat of Tamiya clear orange to the insides. The next technique used was to enable me to replicate paint chips due to heavy wear and combat damage. To do this I used Humbrol maskol applied to the model using a small square of packaging foam rubber. I concentrated on external corners and areas of likely damage and wear.

More masking ensued and the orange was sprayed on those areas. I used Tamiya gloss orange for the base colour that was evenly sprayed on then the orange was lightened using deck tan and highlights were sprayed into the center of each panel.

When this was all dry I masked the orange and unmasked the other areas. For the tan colour I chose Gunze Sangyo sail colour as the base colour. Highlights of this colour were made by adding deck tan and spraying the center of each panel.

Then all could be un-masked and the Humbrol maskol could be picked off to reveal the titanium silver beneath.


I neglected to mention that the for numerals on the shield as I had no decals to use, I had to paint them on using the kit supplied stickers as masks. I cut out the numerals from the stickers and used them as masks, the results of which can be seen below.

Overall I'm quite please with the results obtained so far. The silver chipping is very reminiscent of that found on a beaten up aircraft, quite appropriate I think. Stay tuned for more progress.

Cheers,

Sunday, April 11, 2010

RGM79D Gundam

A good mate from the local modeling club recently gave me a couple of Gundam kits, and this one was amongst them.

It was interesting upon opening the box, as he told me this one was already built. I examined the kit and decided to see what I could do with it as far as a paint job was concerned.

I have never build and painted a gundam kit before (although I must admit I have thrown a few together for my 2 boys) so I was keen to see what a good paint job would do for the kit.

It also helped that I was quite partial to the orange and cream colour scheme on this unit.

First up I filled all of the seams with super glue and sanded them flush to a good finish. I then disassembled the kit as much as possilbe for painting.

The concept I had for this kit is I wanted to have paint chipping as though the unit had seen some action. I wanted in essence to paint the gundam like I would an armor subject but have the chipping as would be  applicable to an aircraft.


The first step in the paint process is of course primer, I used floquil grimy black laquer for this. This also allowed me to check the work I had done on the seams. The dark grey would also be good for the internal parts that might end up being visible.

Next up was the visor on the head, I wanted to have a nice shiny reflective surface. Alclad polished aluminum was the choice here, this was applied over a coat of Gloss black enamel ans looked great. I also applied the alclad to the thrusters on the back as well.


The visor was then given a good goat of Tamiya Clear Green by brush. A gerat looking visor resulted.

Until Next time,

Cheers,

Wednesday, April 7, 2010

Weathering 2

Well I plucked up the courage to do it.

The re-fuelling stain has been applied with some degree of success I think.


I mixed up a transparent colour using Tamiya gloss clear for the base and just a brush full of Tamiya clear blue to give it some colour contrast on the surface of the plane, this mix was heavily thinned with laquer thinners. The reference photo clearly showed the stain being a blue colour, I don't know if this is because of the colour of the fuel or if it is just reflecting the blue of the sky, but it looks cool that way.

I airbrushed on the stain using my fine 0.3mm tip and a pressure of around 5psi. I tried to concentrate on keeping the shape tight and in general accordance with my reference pic. The edges were then lightly feathered to make it look more like a high speed splash mark.

Well there you have it, I would like to hear any feed back on this refueling stain that you may have,

So until next time,

Cheers,

Tuesday, April 6, 2010

Weathering

Well I added some pastel weathering to the airframe. I started by adding some black to the exhaust area with a cut down soft brush. I then added some red brown to the black to get a little colour variation for interest.


Turning my attention to the middle fuselage, my references showed a distinct dark black staining eminating from a small diamond shaped panel over the engines. To try to replicate this I started out with black pastel powder and again brushed it on with a cut down brush in the direction of the air flow. The result was nice but not as distinct as on the reference photos, it needed to be blacker and bulkier....

Not quite knowing what to do I decided to try a new technique. I have 'borrowed' some waste toner from the office photocopier. I again brushed this on carefully concentrating more on the areas closest to the panel and streaking back.

Surprisingly this added the required 'bulk' and 'mattness' to make the stain stand out enough. The technique was successfull enough that I will be trying it again at least!

I also noticed at this last minute that Tamiya has left out a small white blade aerial on the upper fuselage.

I made one out of thin sheet styrene and mounted it to the spot (Tamiya include a panel in the shape of the aerial) with thin super glue.

Well there you have it, just the fuel spill staining to do. I'm still unsure of how best to go about this so stay tuned to find out... it will either make or break this kit.

Cheers,

Monday, April 5, 2010

Cockpit Finising Details

Progressing along nicely now. I added the ejection seat, HUD and Canopy actuators to the cockpit. I had to carefully cut the ejector seat rails from the kit seat, then reduce them in depth by sanding to accomodate the quick boost seat. Its all a rather snug fit in the end - just like the real thing.

The painted resin seat was then secured in position using thick superglue gel.

The HUD was carefully painted flat black for the body and the framing on the sides of the lens was carefully picked out by hand with a 10/0 brush and enamel paint.

This was then secured into position on the top of the instrument panel using Gators grip acrylic glue. This stuff is great for clear parts as it dries quickly to give a good bond and is clear and non fogging.

The kit supplied instrument panel coaming shrouds would completely hide all my painting work on the instrument panel and are overly thick to boot. My reference pics showed that these were folded back over onto the coaming whilst the plane was on the ground, so I decided that this is how I wanted to show mine. I used the kit parts as masters and formed thin lead foil over them using a cotton bud and a toothpick to emboss the shape into the foil. I then carefully cut the formed part from the foil and using gator glue attached them to the coaming. A quick brush coat of flat black enamel and it was good.

The canopy was then added after a quick polish on the inside using novus plastic cleaner. I have also noticed the primed boarding ladder still on the sprue so I'll deal with it shortly.

Here is another pic of the progress so far.
Well just some weathering to do now but a few steps will be needed to complete it so stat tuned,

Till next time,

Cheers,

Sunday, April 4, 2010

Underside Complete


The armament and undercarriage doors have all been added. It was a little fiddly to get every item aligned properly but nothing serious.

The underside is all done now. The cockpit is all that needs to be attended to on the upper surface.

The last remaining task after the cockpit will be some final weathering with pastel chalks.

This will need to be applied to the exhaust area to get some really flat colours on the metallics.

The other area of attention for the pastel chalks will be the small diamond shaped panels on the top fuselage. My references show some very flat black staining coming from these and flowing back along the fuselage in the direction of the airflow. I also have to pluck up enough courage to apply the fuel stain to the top fuselage...

As you can see here the canopy is temporarily tacked in place with blutac to serve as a cockpit mask.

You get a good idea of what the underside of this plane will look like, nice and busy with lots of details, all from the box as well.

The only details I added to the underside is the brake lines to each wheel and the conduits to the landing lights on each undercarriage leg. For these I used different gauges of copper electronics wire.

Well hopefully I will be able to add the finished cockpit update shortly so please stay tuned.

Cheers,
 
eScale Models Link Repository